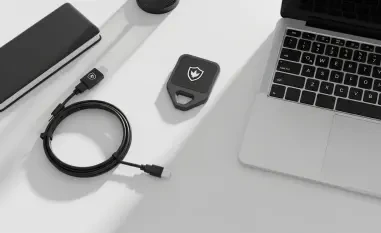
Artificial Intelligence (AI) is rapidly changing the way we approach technology and innovation. However, for many years, AI development required high-powered computers and significant resources, making it difficult for beginners or hobbyists to get involved. Today, that’s changing. Compact developer kits, like the NVIDIA Jetson Nano, are bringing the power of AI to more people, from students and hobbyists to seasoned developers. These compact, affordable kits have made it easier for everyone to dive into AI without needing expensive setups or advanced technical expertise.
Compact developer kits are small, affordable, and user-friendly, making them ideal for experimenting with AI without needing a large budget or complex equipment. Kits like the Jetson Nano offer powerful processing capabilities, allowing users to explore real-world AI applications, such as image recognition, object detection, and even voice processing. This article will guide you through the basics of getting started with AI development using a compact developer kit, including setup instructions and project ideas to jumpstart your journey into the world of AI.
1. Prepare Your Materials
To kick off your AI development adventure, the first step involves gathering the necessary materials. You will need a microSD card with at least 16GB of storage. This storage medium is crucial because it will house your system image and necessary software to run your Jetson Nano. Additionally, you will need to download the system image for the Jetson Nano from NVIDIA’s official website. This image contains the operating system and essential files required for the Jetson Nano to function correctly.
Once you have procured a suitable microSD card and downloaded the system image from NVIDIA’s website, you are ready to proceed to the next step. It’s vital to ensure your microSD card meets the minimum storage requirements, as this will impact the performance and usability of your Jetson Nano. With the right materials in hand, you are well on your way to setting up an incredibly versatile and powerful AI development environment.
2. Load the System Image
Now that you have your materials prepared, the next step is to transfer the downloaded system image onto the microSD card. To do this, you will need to use a computer with a microSD card reader. There are various software tools available to assist with this process, such as Etcher, which is a simple and efficient utility for writing system images to storage devices. Begin by inserting the microSD card into your computer’s card reader.
Open the software tool of your choice, select the downloaded system image, and choose your microSD card as the target device. Follow the on-screen instructions to complete the writing process. The duration of this process may vary depending on the speed of your computer and the microSD card. Once the system image has been successfully written to the microSD card, safely eject the card from your computer. You are now ready to insert the microSD card into the Jetson Nano and proceed with the setup.
3. Insert the MicroSD Card
With the system image loaded onto your microSD card, it’s time to set up the Jetson Nano. Locate the microSD card slot on the Jetson Nano and carefully insert the prepared card. Make sure that the card is seated properly to ensure that the device can read the image correctly. This step is critical, as a misaligned card can result in unsuccessful boot attempts or damage to the card or slot.
Once the microSD card is securely inserted, the Jetson Nano is ready for the next phase of the setup process. Inserting the microSD card correctly ensures the Jetson Nano can access the essential files and software needed to operate. This step forms the foundation of your AI development environment, enabling the Jetson Nano to boot up and function effectively with the preloaded system image.
4. Connect Peripherals
The Jetson Nano, now equipped with the microSD card, requires additional peripherals to function fully. Connect a keyboard, mouse, and display to the device to enable interaction. These peripherals are essential for navigating the development environment and executing AI applications. The Jetson Nano has various ports to accommodate these devices, including USB ports for the keyboard and mouse, and an HDMI port for the display.
Attach each peripheral to its corresponding port on the Jetson Nano. Ensuring that these peripherals are properly connected is vital for smooth operation during the initial setup and subsequent use. With a connected keyboard, mouse, and display, you will be able to interact with the Jetson Nano’s interface, configure settings, and start working on your AI projects. These peripherals provide the necessary interface for effective communication between you and the Jetson Nano.
5. Power Up the Device
After connecting the necessary peripherals, it’s time to power up the Jetson Nano. Plug in the power adapter to the Jetson Nano, ensuring a stable power supply. Switch on the device by either plugging in the power cord or using a power button if available. The device should start to boot up, initiating the process of loading the system image from the microSD card.
During the initial boot-up, closely monitor the Jetson Nano to ensure that everything is functioning correctly. The power-up process might take a few moments, as the system image loads and the operating system initializes. This period is crucial for determining if the microSD card and peripherals were connected properly. A successful boot-up will lead to the initial setup screen, confirming that the Jetson Nano is ready for further configuration and installation of essential software.
6. Initial Boot-Up
The Jetson Nano will display its initial setup screen after a successful boot-up, signaling that it is ready for further configuration. At this point, you might need to provide basic setup information, such as setting your language preferences, time zone, and creating a user account. These settings will ensure that your Jetson Nano environment is tailored to your requirements, enhancing the overall user experience.
Upon completing the initial setup, you will gain access to the desktop environment of the Jetson Nano. This environment serves as the primary interface for interacting with the device and executing AI applications. Here, you can open terminal windows, access file systems, and manage various settings. The initial boot-up marks a significant milestone in setting up your Jetson Nano, paving the way for the installation of advanced AI tools provided by NVIDIA’s JetPack SDK.
7. Install JetPack SDK
The next step involves installing the JetPack SDK, a comprehensive collection of AI tools, libraries, and APIs that simplify the development process on the Jetson Nano. Follow the on-screen instructions to download and install JetPack SDK. This package includes everything you need to start experimenting with AI applications, from deep learning frameworks to computer vision libraries.
For beginners, JetPack SDK simplifies the complex world of AI development by providing pre-configured tools and resources. The package is designed to work seamlessly with the Jetson Nano, maximizing its hardware capabilities. Once JetPack SDK is installed, you gain access to NVIDIA’s extensive AI ecosystem, which includes TensorRT for optimized inference, cuDNN for deep learning, and various other essential components. These resources empower you to develop, test, and deploy AI models effectively on your Jetson Nano.
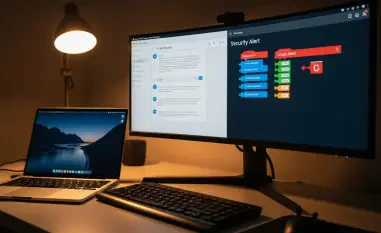
8. Start Experimenting
With JetPack SDK installed, you’re ready to start experimenting with various AI applications. The SDK includes access to pre-trained models, allowing you to dive into projects without spending time training new models from scratch. This feature is particularly beneficial for beginners, as it provides a hands-on introduction to AI development. Utilize available documentation and tutorials to guide your experimentation and project development.
Consider starting with simple, beginner-friendly projects to become familiar with the Jetson Nano’s capabilities. For instance, you can create an image classifier using a connected webcam, build a smart surveillance system with object detection features, or develop a voice recognition system that responds to specific commands. These projects will help you understand the fundamentals of AI, giving you the skills and confidence to tackle more complex applications.
Extended Experimentation and Development
Once you’ve completed some beginner projects, you can transition to more advanced applications. The NVIDIA Jetson Nano supports a wide range of AI tasks, from computer vision and robotics to natural language processing. Leveraging the full potential of JetPack SDK, you can experiment with custom neural networks, optimize models for better performance, and even deploy applications in real-world scenarios.
As you become more proficient, consider collaborating with the broader AI development community. Participate in forums, contribute to open-source projects, and share your experiences and solutions. The Jetson Nano’s versatility and robust support make it an excellent platform for continual learning and innovation. By engaging in ongoing experimentation and development, you will not only improve your skills but also contribute to the growing field of AI technology.
Conclusion
Artificial Intelligence (AI) is revolutionizing our approach to technology and innovation. In the past, AI development demanded high-powered computers and substantial resources, posing challenges for beginners or hobbyists. Today, that scenario is shifting. Compact developer kits, like NVIDIA’s Jetson Nano, are making AI accessible to a broader audience, including students, hobbyists, and experienced developers. These kits are compact and affordable, eliminating the need for expensive setups or advanced technical skills.
Compact developer kits are designed to be small, cost-effective, and user-friendly, making them perfect for those with limited budgets or equipment. Kits like the Jetson Nano provide powerful processing abilities, enabling users to explore AI applications in real-world scenarios, such as image recognition, object detection, and voice processing. This article aims to introduce you to the basics of AI development using a compact developer kit. We will cover setup instructions and project ideas to help you kickstart your AI journey. These kits empower users to delve into AI and innovate without barriers.